Hello all, Dani here~
Earlier this month JesterFoxx from DeviantArt asked me if I could do a walk through for SFXmakeup of a black plague victim. He saw my work from wayyyy back in 2007 for my Halloween costume.
(Ohhhh the mistakes I can see now.... xD)
ANYWAY, he wanted to be a plague victim this Halloween and was looking for some guidance.
Welp, here you go! :D
First things first, get all your supplies together.
From right to left:
Prep & Application supplies (alcohol swabs, cue-tips, cotton balls, paper towels)
Construction materials (School glue, scar putty, liquid latex)
Coloring supplies (Cream makeup of red, green, brown, purple/blue, eyeliner of red, brown, black)
Finishing supplies (Fake blood liquid and scabbed, food dye of red and black, spray coloring of black)

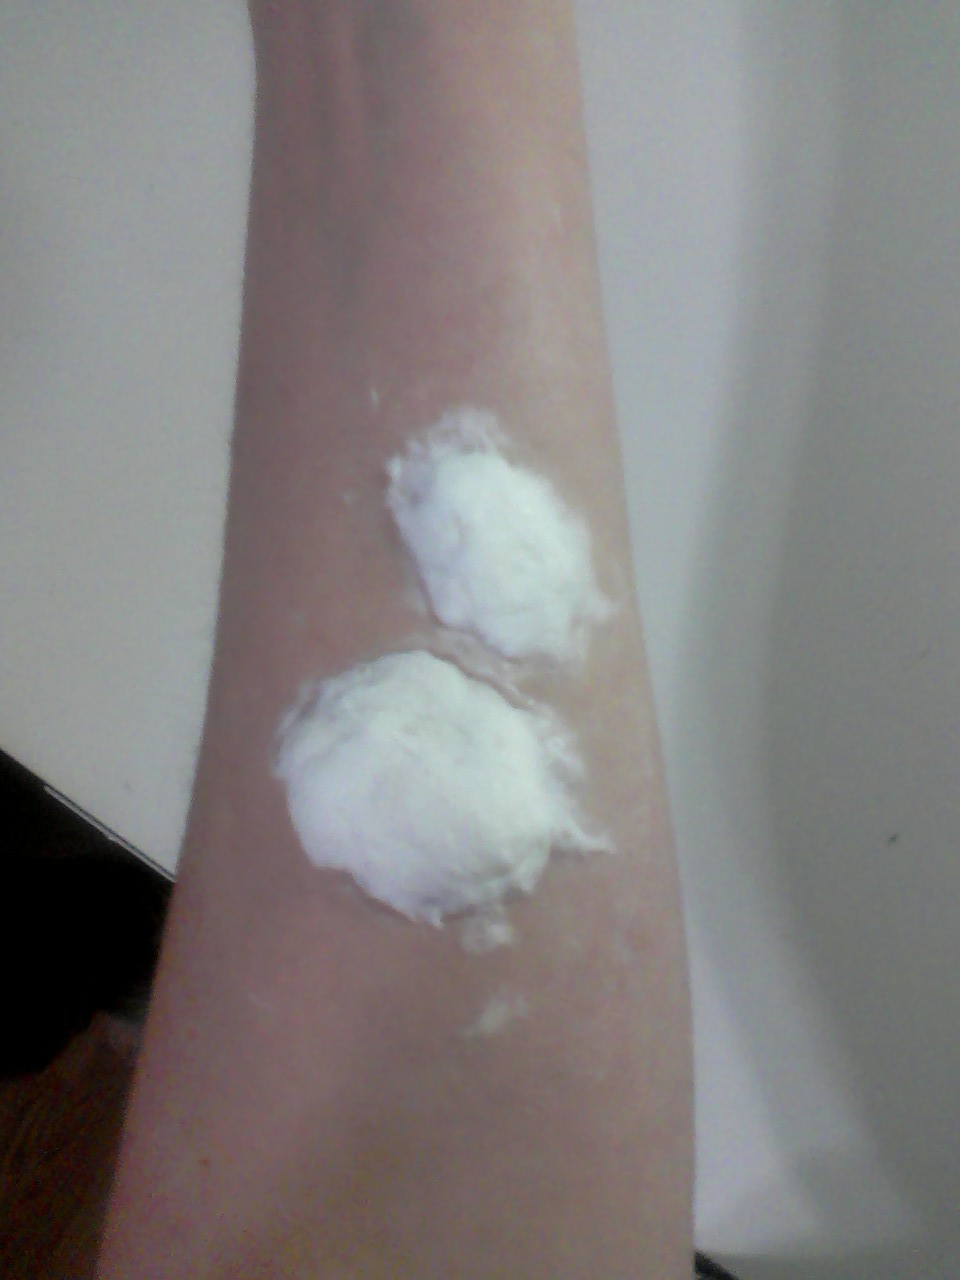
(So that I could take pictures and work without having to stand infront of the mirror, I put the boils on my arm. For realisim they should be mostly around the neck, smaller one on the face if wanted.)
First you need to make sure your skin surface is clean, as that will help the sculpt stick.
Once you're ready, Get messy! Take some tissue paper or the like and coat it in school glue. Try to make it into a paper mache like texture. Before the paper completely dissolves, just stick it on your skin. Smooth out the edge just enough so it has a strong anchor, you want the growth rather round.
Here's mine wet, and then again once it's dry:

Next, cover the whole mess with liquid latex.
(Unless you're allergic of course. Be sure to test this first.)
This will make sure that the makeup will last the whole night, plus it gives you a better surface.

Now is the hard part. Color.
See the awesome thing about color is: If it doesn't look right, just keep working with it. Especially with makeup for monsters/zombies/plague victims to messier it is, the better the over all look will be.
The /bad news/ about color is: it is bloody difficult to explain how to do it properly. Really the best I can do is warn that it /will/ look really awful for quite some time, but stick with it and it will turn out. :)
Start with red for inflammation, add some purple for the bruising, brown to blend all the edges, and just a hint of green for infection.


Once you're happy with the color, add some scabbed blood (if you don't have this, just mix some black food dye with fake blood and let it dry in a glob.) in a /few/ spots(be sparring!). Then from those points add liquid blood and let it drip on it's own.

Anddddd That's really just it for the boils! :D
Now for the bonus rounds! Face and hands!
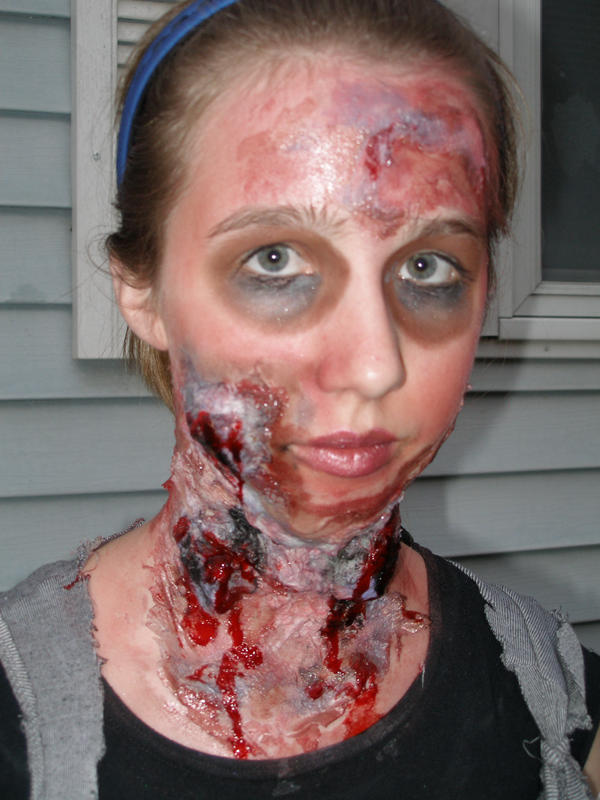
For your face, start with a red eyeliner. All around your eye, heavy in the inside corners, and blend it all out. Then color your face to taste, using the brown or grey. Color the hollows of your eyes and cheekbones and the corners of your mouth and nose.

(I was lazy and only did have my face, but that was clever so you can see the difference! ;D )
And if you don't mind the most bitter taste you've ever had, gargle some red food dye. It'll stain your gums and teeth (until the nest time you brush) and looks really wicked. (Do not gargle black, just add a bit around the edges with a cue-tip.)


Now by this time, if you're anything like me, your hands are more painted then your makeup work.
The good news is: you get to cover this up with gangrene! Yayyyyyy!
Spray-on black food dye works best, if not just use the liquid.
'Paint' your hands black, the darkest at your fingertips and fade it out as you move up. Once you've got a base, tip your fingernails in the red food dye then rub it off. It will stain your fingertips and then fade into purple with the black.


Now to taste, blend in some green wear the black fades out and drag that up into your wrist.


And that's it! You're finished!
Mine looked like this, but with more time investment (and a better camera) it can look even better. :)


Good luck and Happy Halloween~
-Danielle


